


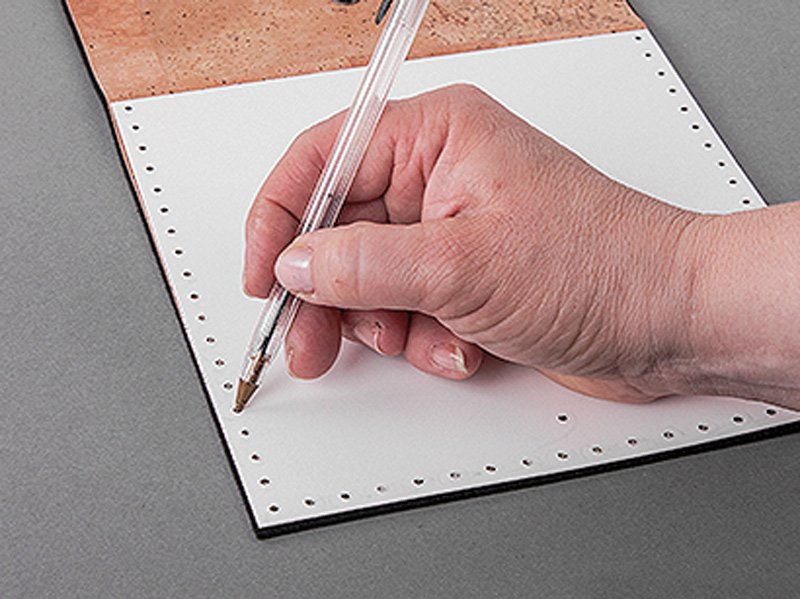
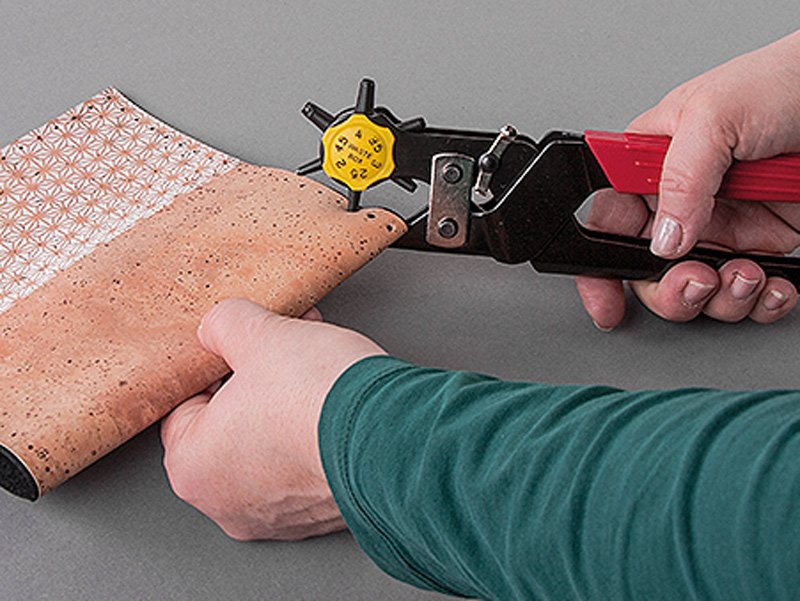
Instructions in 8 steps For the pattern, stencil a part of the cork cutting. To achieve a nice and even seam, use the template to poke the holes with the hole punch pliers.
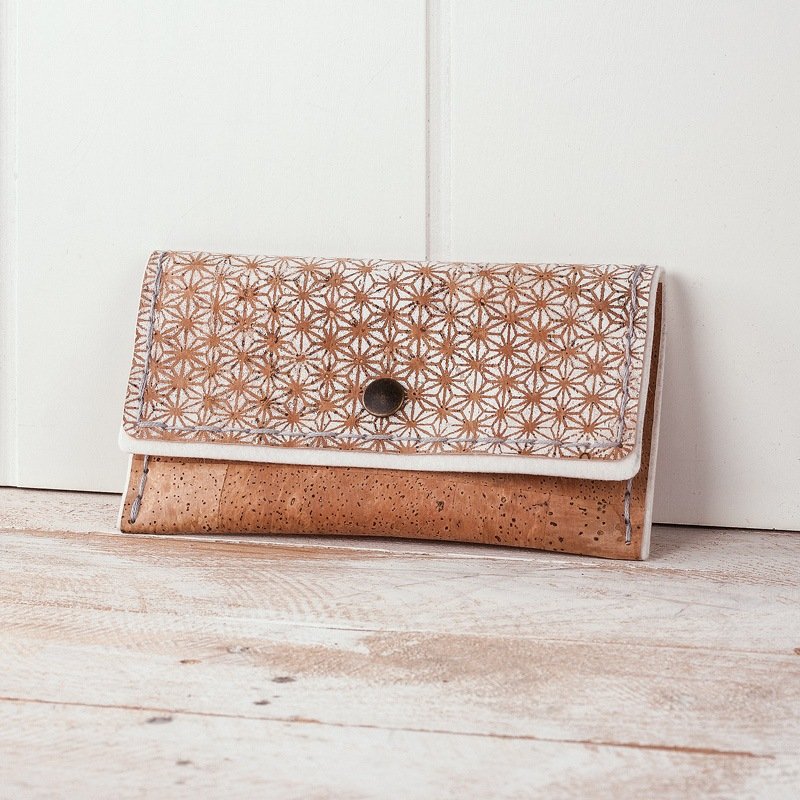
Cork fabric – 29 cm × 18 cm; Felt fabric: 29.5 cm × 18.5 cm
Besides the articles listed below, you also need: Hammer
And this is how it works: 1 ![]()

Step 1
Cut out manufacture:Cork fabric – 29 cm × 18 cm; Felt fabric: 29.5 cm × 18.5 cm
??? Die Schnittmuster findest du im PDF der Bastelidee. Einfach herunterladen. ???
2 ![]()
Step 2
Stencil the pattern with the white Chalky Finish colour and the sponge stamp on the flap of the cork cutting, with very little colour.3 ![]()
Step 3
Stick the cork cutting on the felt cutting with the adhesive-tape, but remain far enough away, with the adhesive-tape 1.5 cm, from the two long outer edges.4 ![]()
Step 4
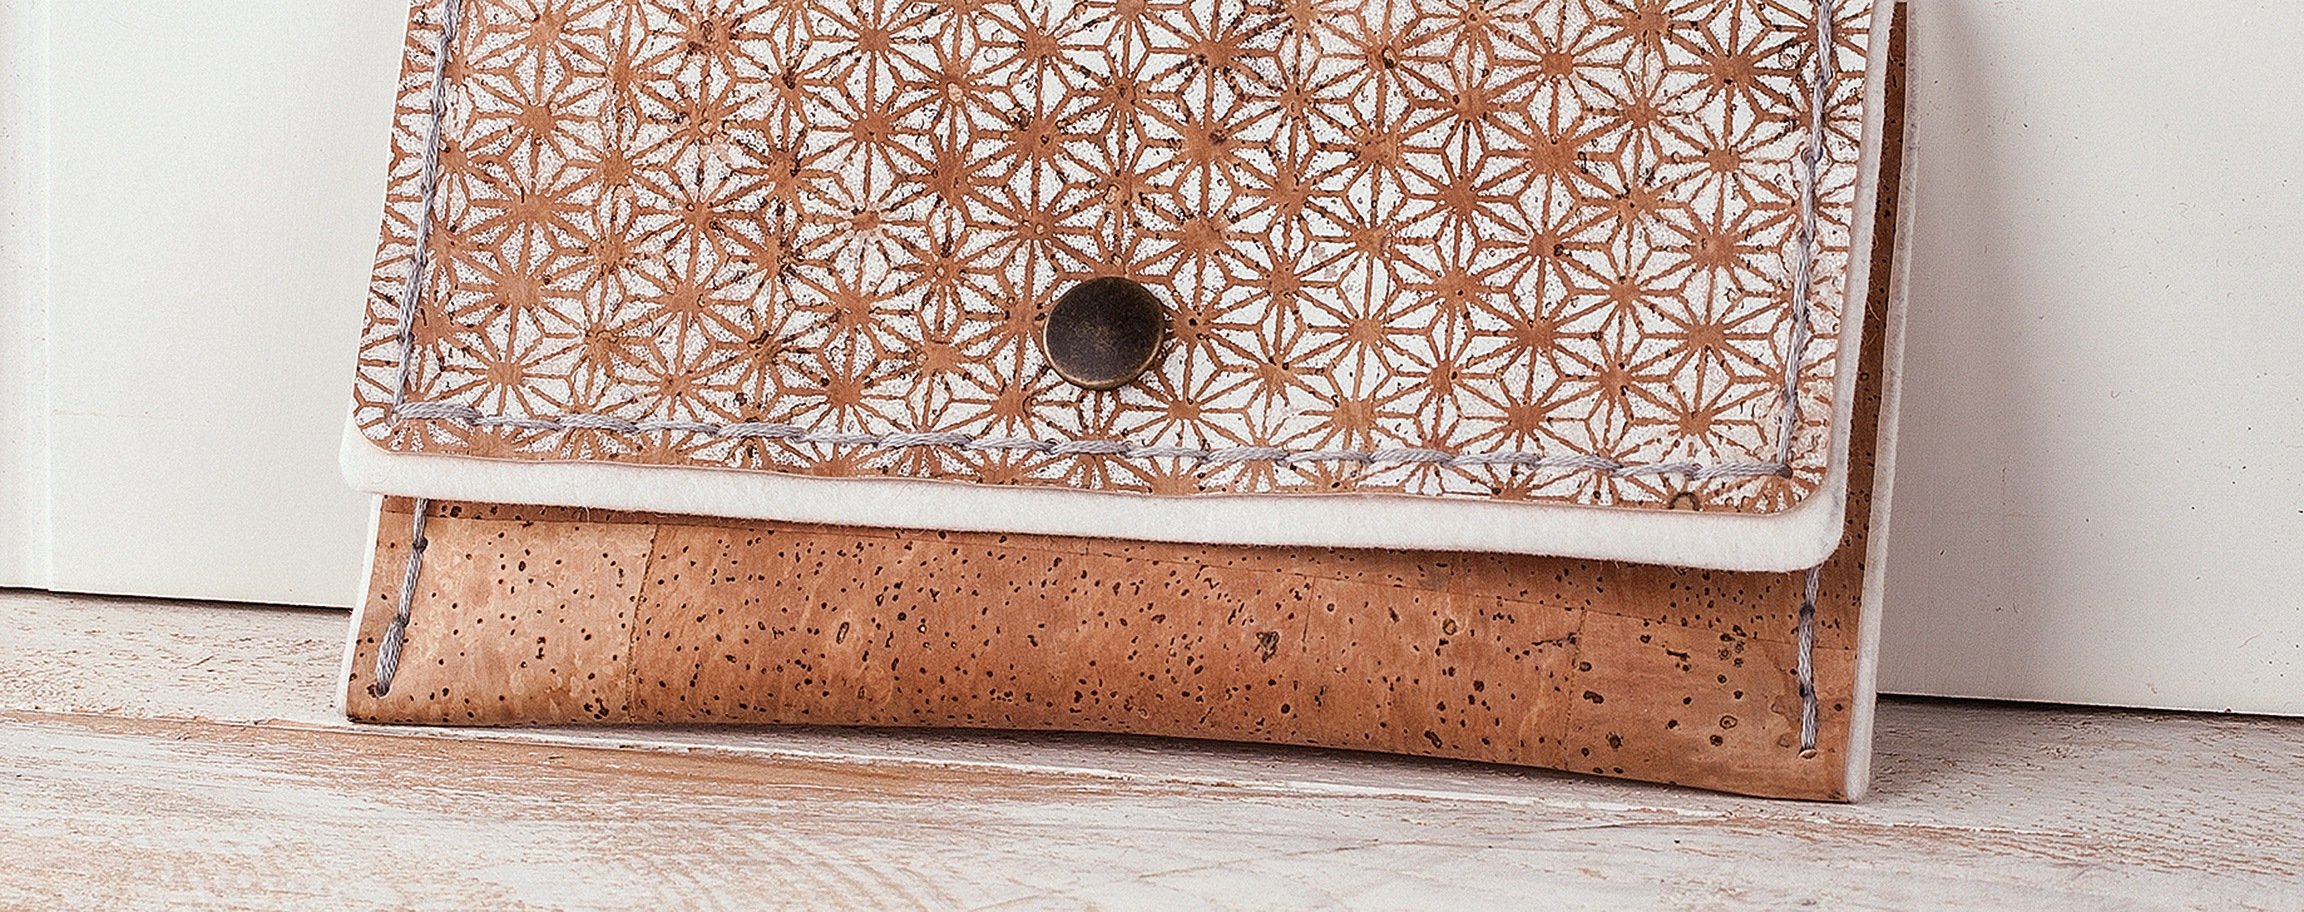
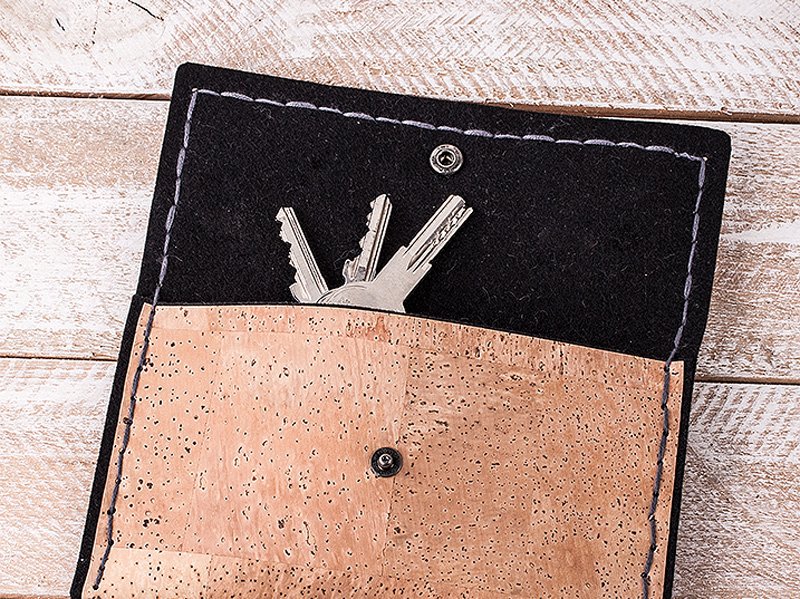
In the lower part of the cork-pouch, attach the lower button (as described in the push-button instructions) (measure 4.5 cm from the center of the short edge).5 ![]()
Step 5
Mark the punched-holes by using the stencil. Turn down the lower part of the pouch to the flap and secure it with pins.6 ![]()
Step 6
Afterwards, press the marked punched-holes with the punch pliers. Cut off 1.5 m yarn.7 ![]()
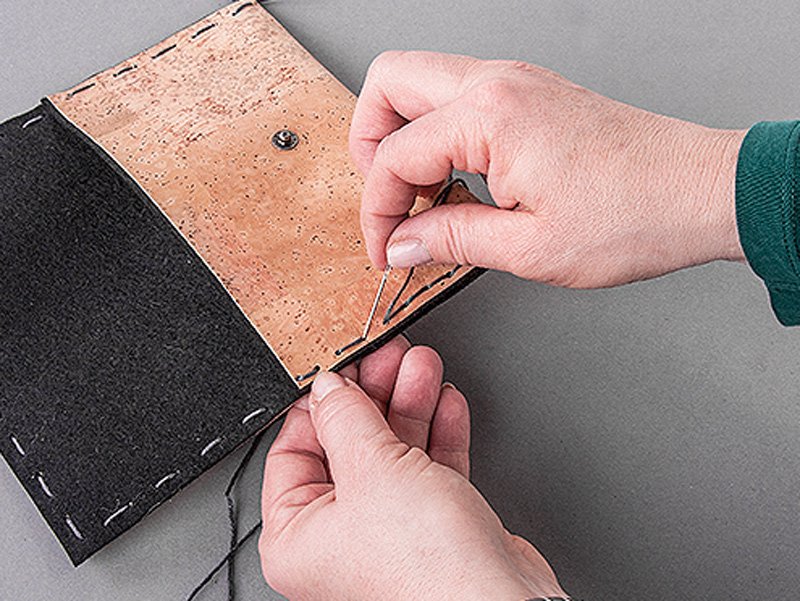
Step 7
Close the pouch with a simple backstitch. Starting from the lower right side of the pouch over the flap to the left lower side of the pouch and then all back again.8 ![]()
Step 8
Now, attach the upper push-button (as described in the push-button instructions) at the pouch-flap (measure 2 cm from the short edge).Related craft ideas Looking for similar craft ideas? You can find them here: ![]()
![Difficulty -]()
![]()
![Difficulty -]()
![]()
![Difficulty -]()
![]()
![Difficulty -]()
Cork pouch for the shopping cart chip
DIFFICULTY

Shopper out of cork
DIFFICULTY
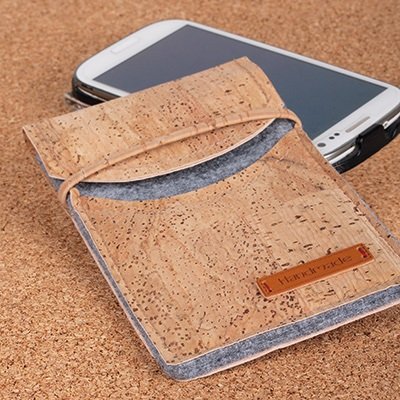
Cork mobile phone case
DIFFICULTY
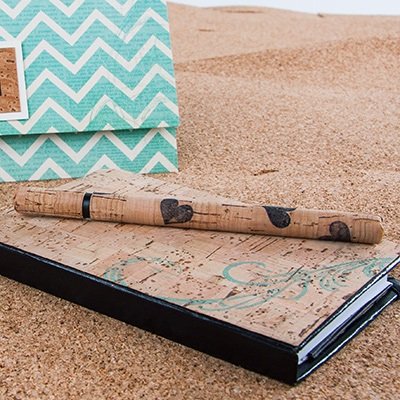
Cork ballpoint-pen with heart
DIFFICULTY
