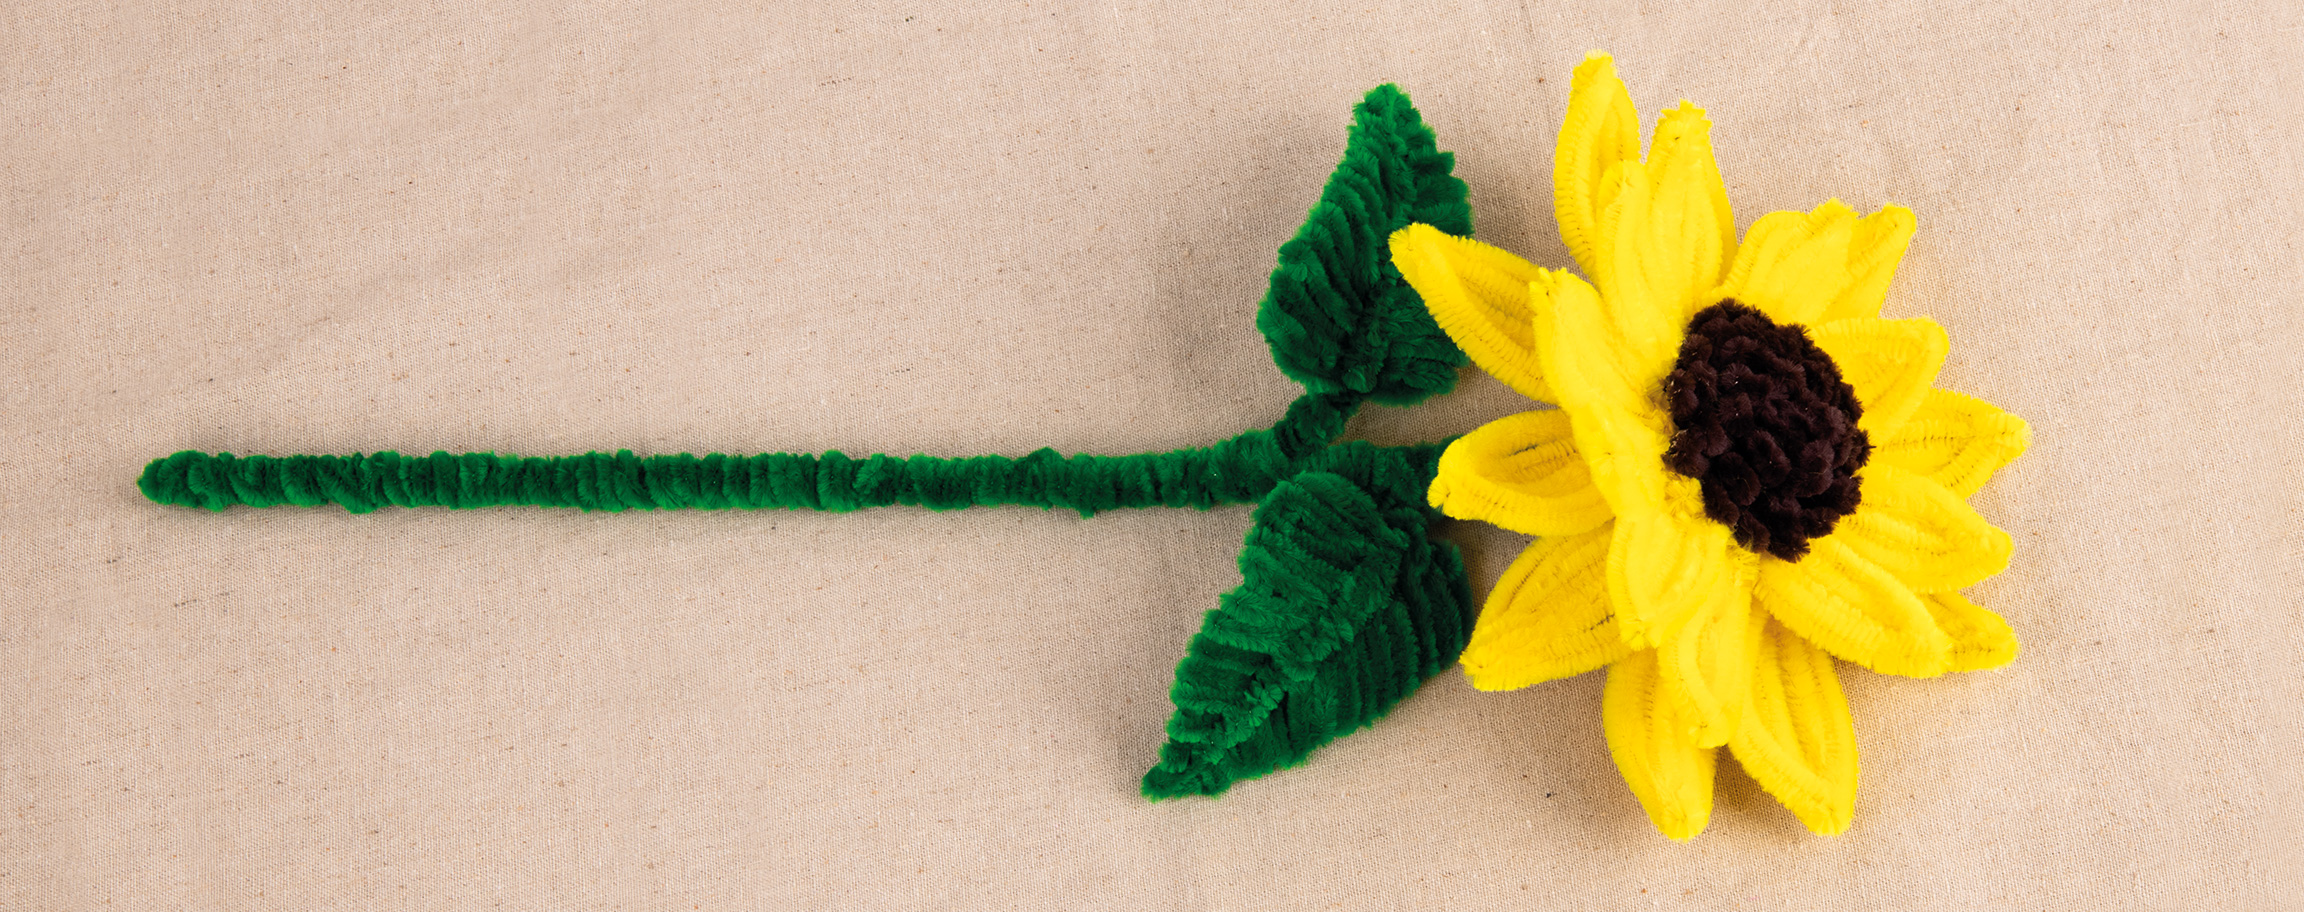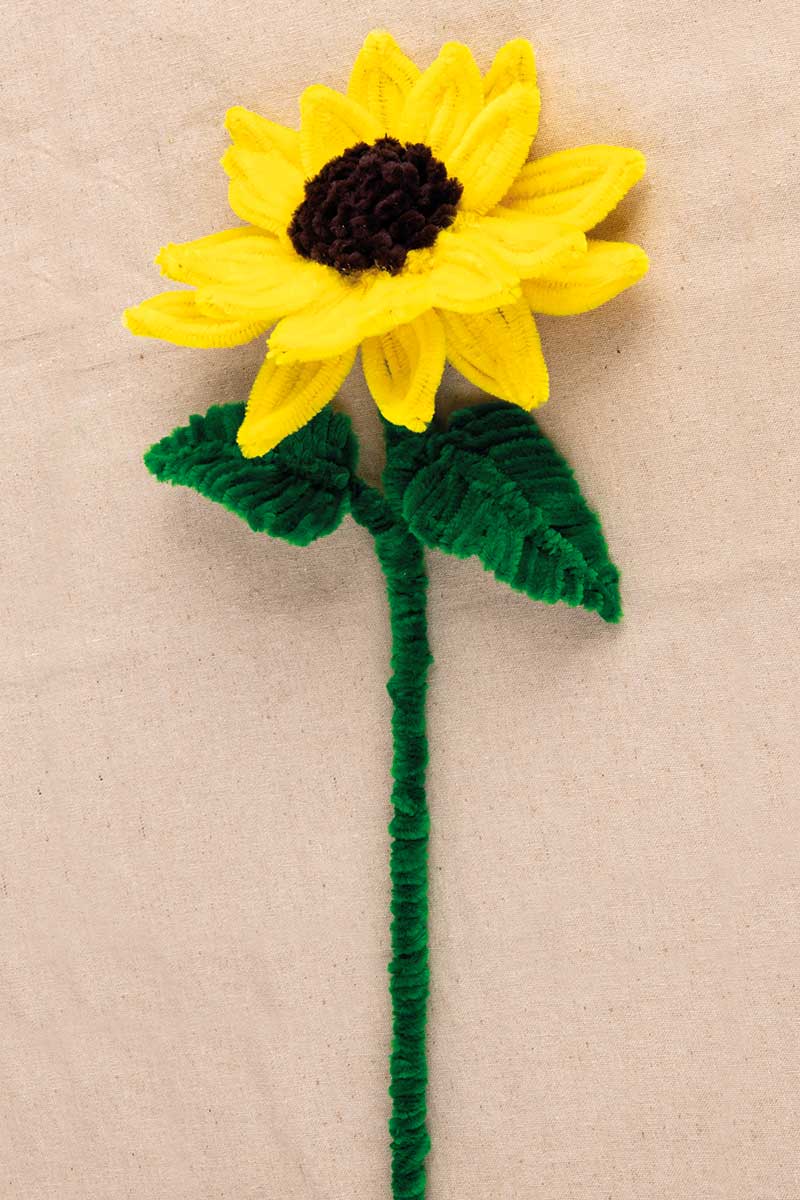
Instructions in 16 steps The chenille wire, available in various colours, is easy to shape. A pretty sunflower is created that you can use as a long-lasting decoration.
Besides the articles listed below, you also need: Wire cutters, ruler, hot-melt glue
And this is how it works: 1 ![]()
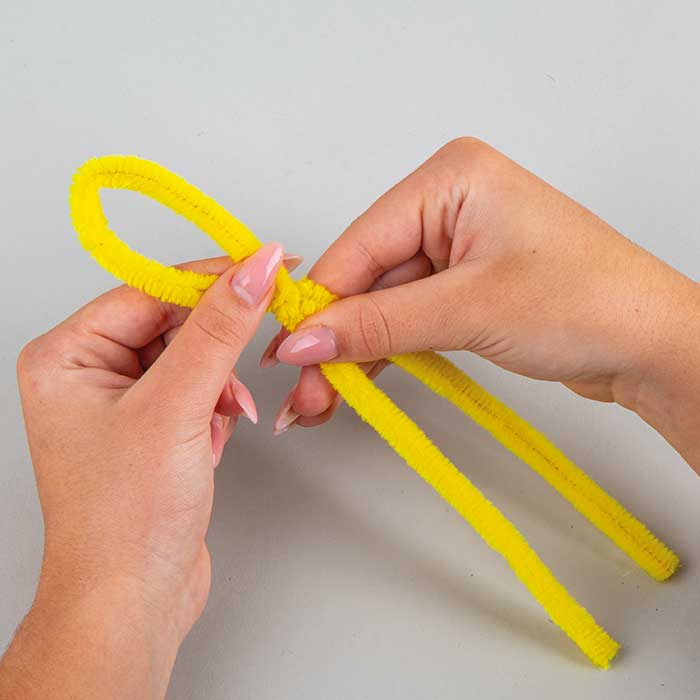
Step 1 - Petals
To make a sunflower, you need 20 petals in all, 10 smaller and 10 larger. Fold the chenille wire in half lengthwise and make a loop about 8 cm from the middle of the fold, twisting the wire twice.2 ![]()
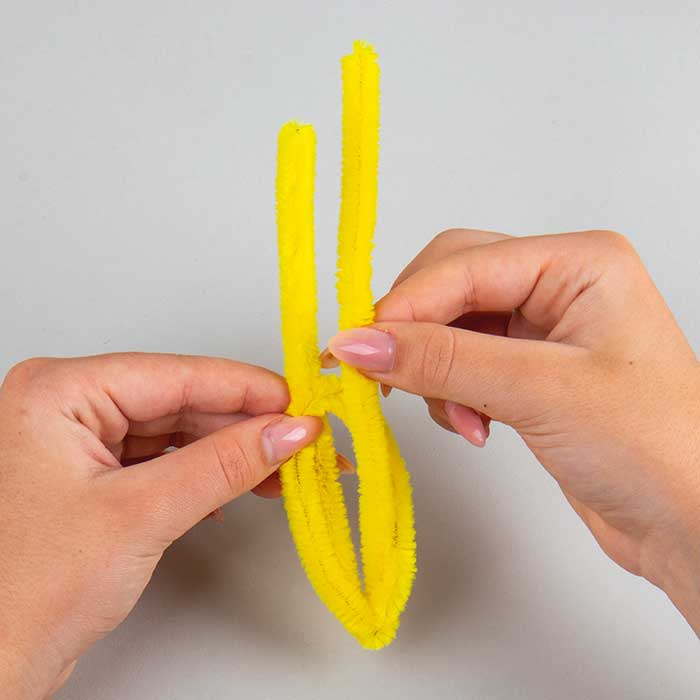
Step 2 - Petals
Bend the two hanging down chenille wires towards the loop to cover the surface of the loop to create a petal. Pass one end of the wire through the loop, then fold the two wires inside the outline of the petal to fill it. Do the same to create the 10 small petals, each about 6.5 cm long. For the small petals, shorten the chenille wire ends by cutting them to about 2 cm with wire cutters.3 ![]()
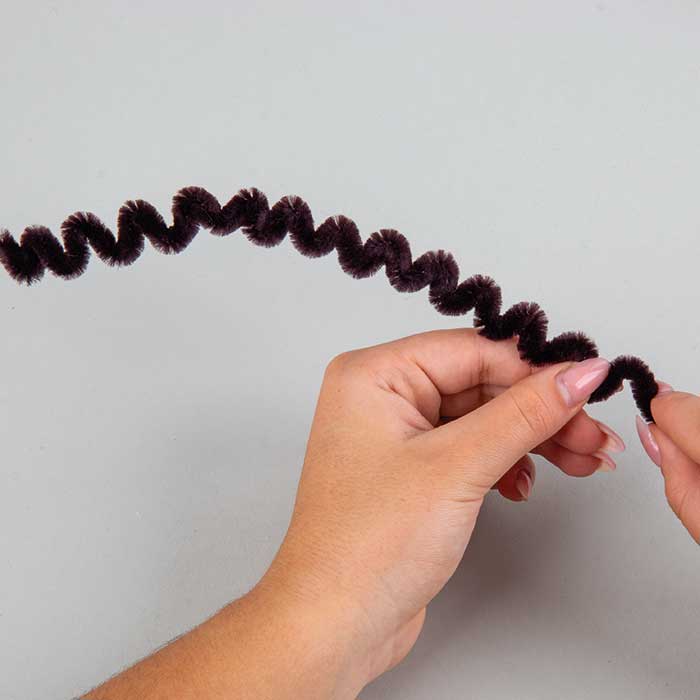
Step 3 - Sunflower head
To create the sunflower head, fold 3 brown chenille wires in an even zigzag pattern.4 ![]()
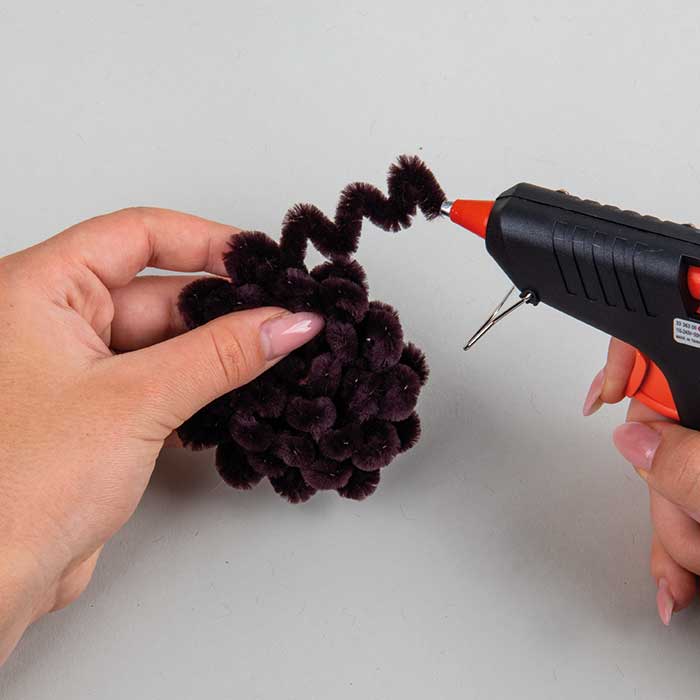
Step 4 - Sunflower head
Roll up the 3 chenille wires tightly around themselves and secure them with a drop of hot-melt glue. The result is a great, round sunflower head.5 ![]()
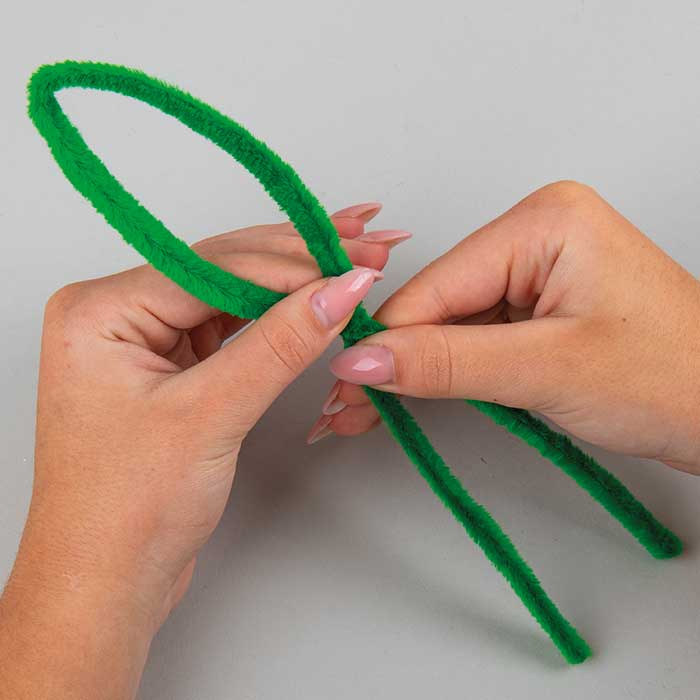
Step 5 - Leaves
To make the sunflower leaves, you need 4 green chenille wires for each leaf. Fold the chenille wire in half lengthwise and make a loop about 13 cm from the middle of the fold by twisting the two hanging ends.6 ![]()
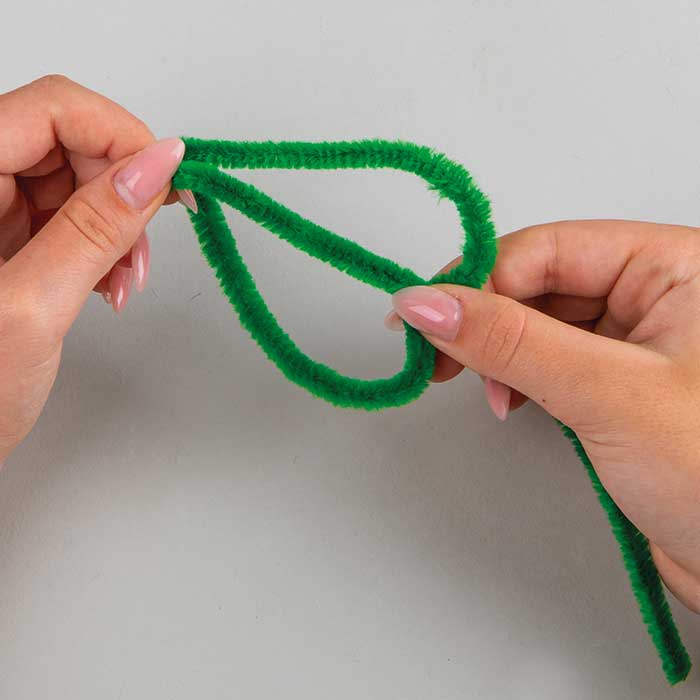
Step 6 - Leaves
Form the loop into a heart shape. Fold one of the hanging down chenille wires towards the middle of the leaf and fix its end firmly to the tip of the leaf.7 ![]()
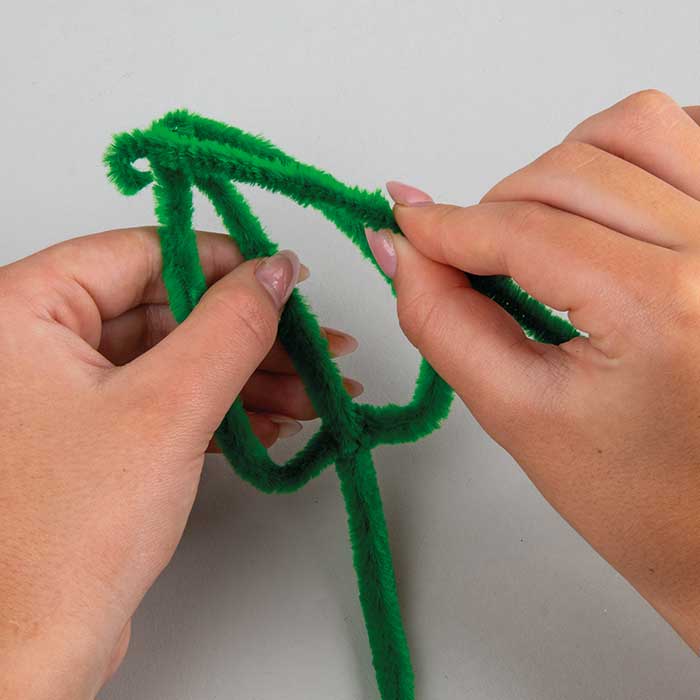
Step 7 - Leaves
Fix another green chenille wire on the left side of the leaf tip.8 ![]()
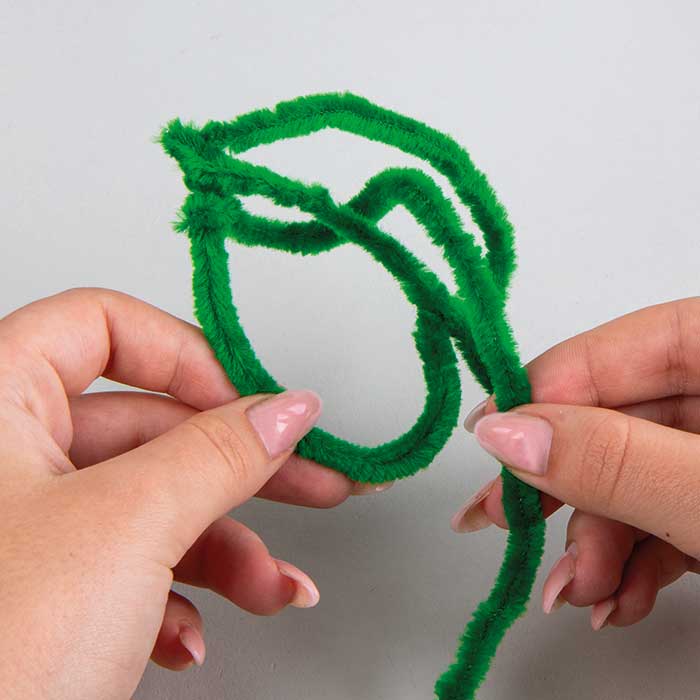
Step 8 - Leaves
Roll it up as follows to form the structure of the leaf: from the outside left to the middle right, making a complete turn.9 ![]()
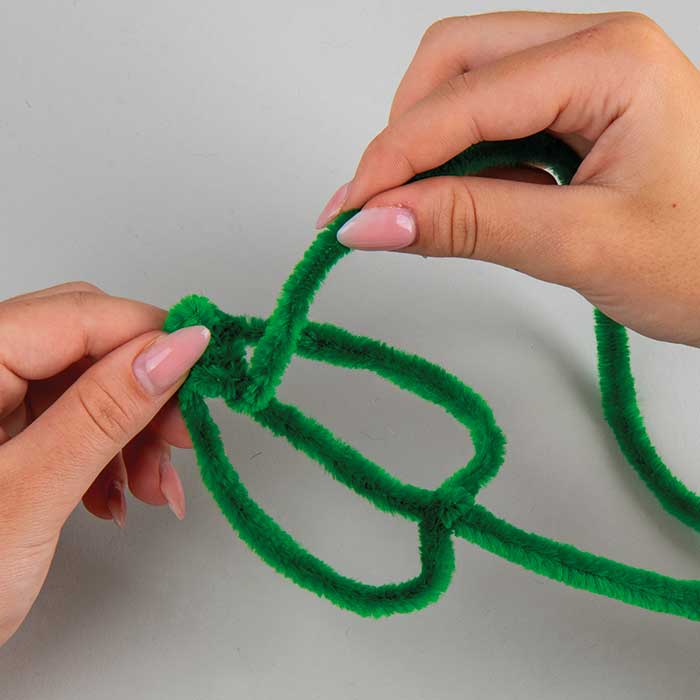
Step 9 - Leaves
From the middle to the outside top right with half-winding, back to the middle bottom with full winding, from the middle to the outside top left with half-winding.10 ![]()
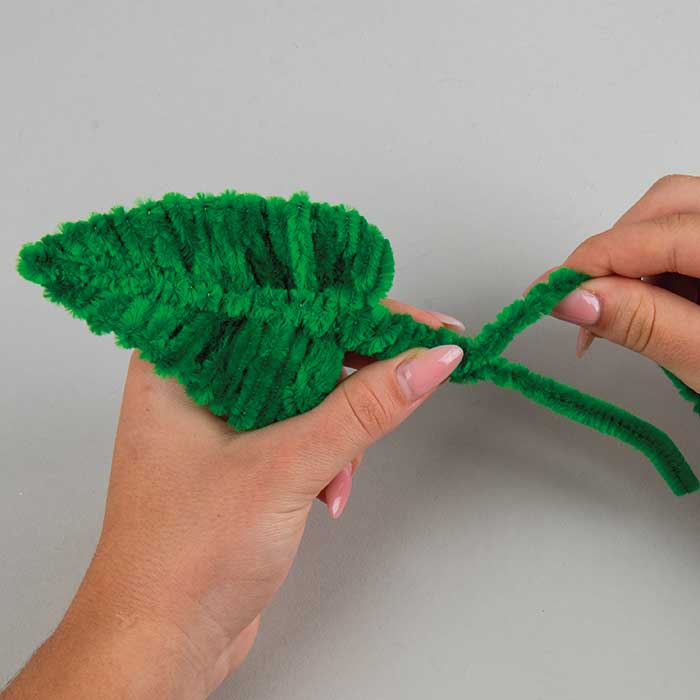
Step 10 - Leaves
Repeat this step until the leaf is completely filled. If necessary, roll up a new chenille wire in the same way as described above.Hint: Do not warp the shape of heart and proceed with each new winding step so that no holes occur.
11 ![]()
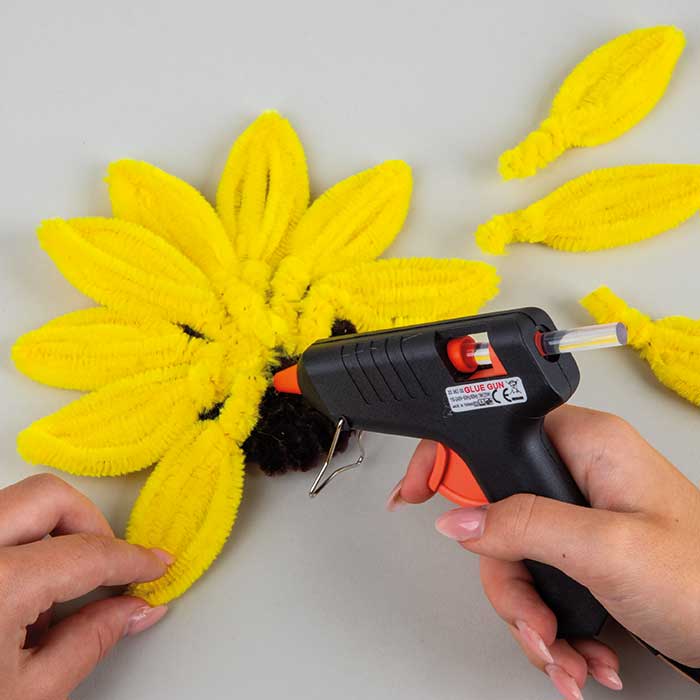
Step 11 - Assembling all of the parts into a flower
Lay the finished brown flower head face-down on the table. The small yellow petals should now be spread out in a star shape on the rear side of the flower head, and each one glued on by means of the hot-melt glue.12 ![]()
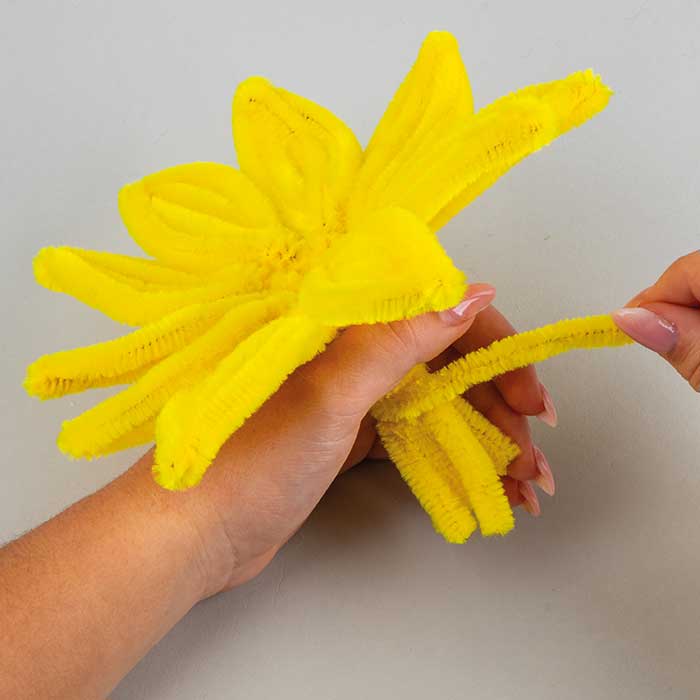
Step 12 - Assembling all of the parts into a flower
Arrange the large yellow petals in your hand to form a uniform bouquet.13 ![]()
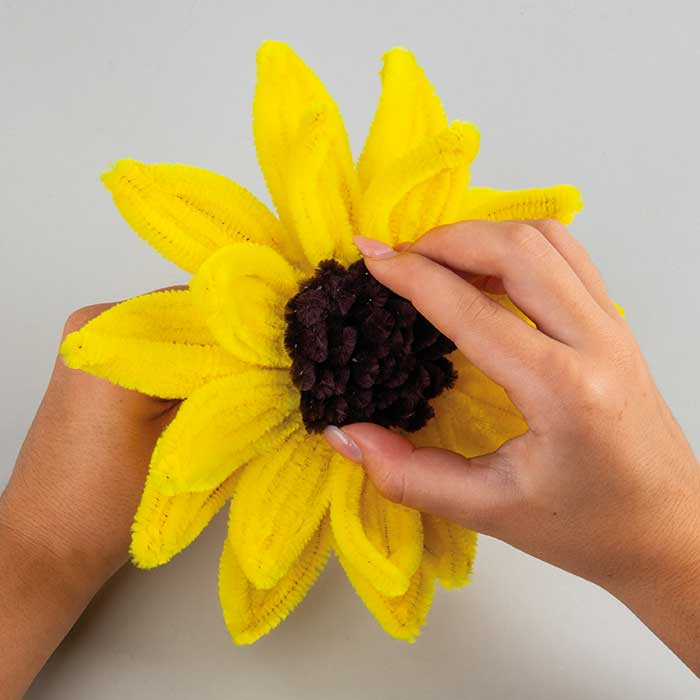
Step 13 - Assembling all of the parts into a flower
Now place the upper part (with flower head and small yellow petals) on the lower part (with large yellow petals) and stick it firmly in place.14 ![]()
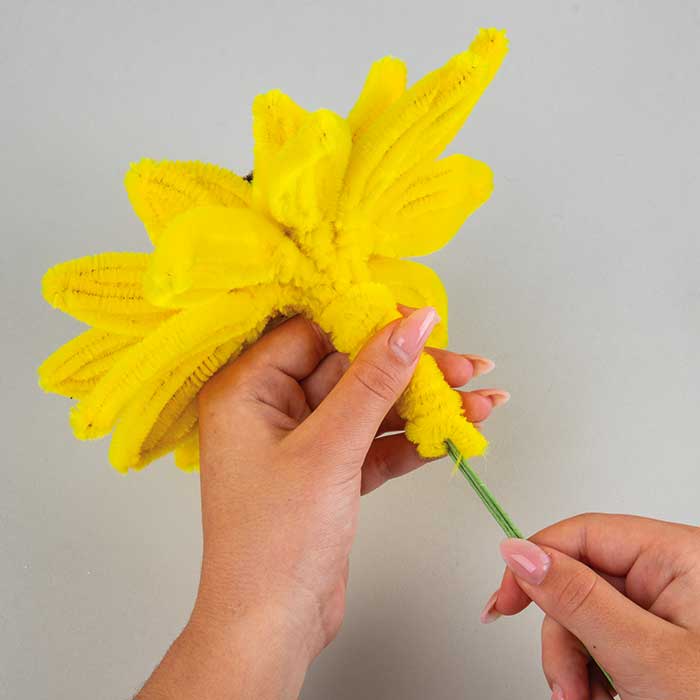
Step 14 - Assembling all of the parts into a flower
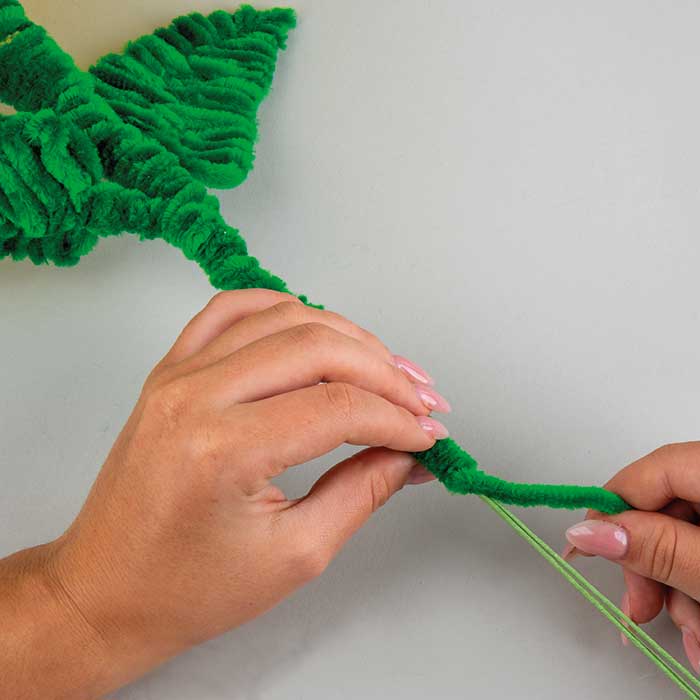
Gather the ends of the outer petals and insert 3 floral wires down the middle of the stem.15 ![]()
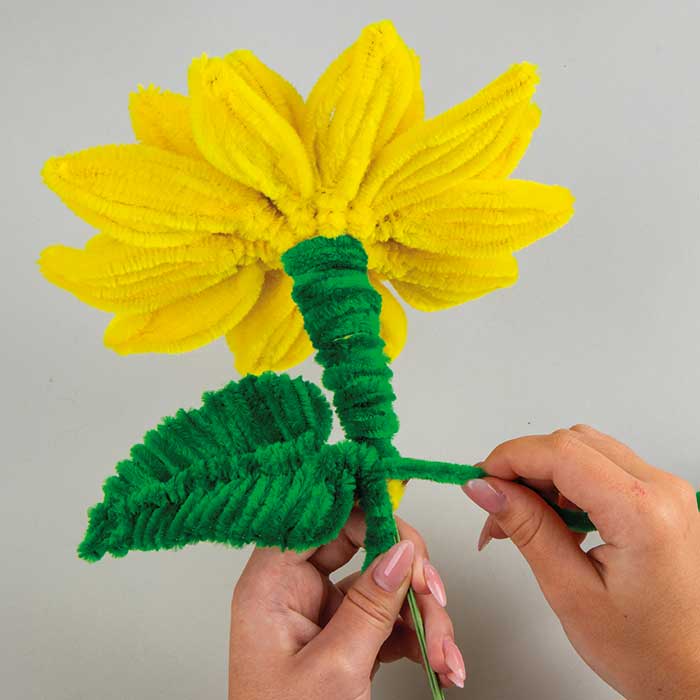
Step 15 - Assembling all of the parts into a flower
Wind the other green chenille wires around the whole stem. The green leaves must be inserted into the stem covered with chenille wire and evenly distributed.16 ![]()
